- Afrikaans
- Albanian
- Amharic
- Arabic
- Armenian
- Azerbaijani
- Basque
- Belarusian
- Bengali
- Bosnian
- Bulgarian
- Catalan
- Cebuano
- Corsican
- Croatian
- Czech
- Danish
- Dutch
- English
- Esperanto
- Estonian
- Finnish
- French
- Frisian
- Galician
- Georgian
- German
- Greek
- Gujarati
- Haitian Creole
- hausa
- hawaiian
- Hebrew
- Hindi
- Miao
- Hungarian
- Icelandic
- igbo
- Indonesian
- irish
- Italian
- Japanese
- Javanese
- Kannada
- kazakh
- Khmer
- Rwandese
- Korean
- Kurdish
- Kyrgyz
- Lao
- Latin
- Latvian
- Lithuanian
- Luxembourgish
- Macedonian
- Malgashi
- Malay
- Malayalam
- Maltese
- Maori
- Marathi
- Mongolian
- Myanmar
- Nepali
- Norwegian
- Norwegian
- Occitan
- Pashto
- Persian
- Polish
- Portuguese
- Punjabi
- Romanian
- Russian
- Samoan
- Scottish Gaelic
- Serbian
- Sesotho
- Shona
- Sindhi
- Sinhala
- Slovak
- Slovenian
- Somali
- Spanish
- Sundanese
- Swahili
- Swedish
- Tagalog
- Tajik
- Tamil
- Tatar
- Telugu
- Thai
- Turkish
- Turkmen
- Ukrainian
- Urdu
- Uighur
- Uzbek
- Vietnamese
- Welsh
- Bantu
- Yiddish
- Yoruba
- Zulu
Oct . 13, 2024 04:27 Back to list
Erecting a Metal Shed A Practical Guide
Building a metal shed can be a rewarding project for anyone looking to increase their outdoor storage space, enhance their backyard aesthetics, or create a dedicated workshop. Metal sheds are durable, weather-resistant, and often require less maintenance compared to wooden structures. This guide will walk you through the essential steps involved in erecting a metal shed, ensuring a successful and efficient project.
Step 1 Planning and Preparation
Before you start constructing your metal shed, it’s crucial to plan ahead. Begin by determining the size and style of your shed based on your storage needs and the available space in your yard.
1. Choosing Location Select a level area with good drainage. Avoid spots where water accumulates after rain. Also, consider accessibility for both entry and your tools or materials.
2. Local Regulations Check local zoning laws and building codes. You may need a permit to build a shed, depending on your location and the shed size.
3. Material Selection Decide on the type of metal for your shed. Galvanized steel is popular for its durability and resistance to corrosion. Choose a gauge that provides adequate strength without being overly heavy.
Step 2 Gathering Tools and Materials
Once you have a clear plan, it's time to gather your materials and tools. You will typically need
- Metal panels - Framing materials (if applicable) - Screws and fasteners - Concrete blocks or a pre-made foundation (for stability) - Tools such as a drill, level, measuring tape, and screwdriver - Safety gear, including gloves and goggles
Step 3 Preparing the Foundation
A solid foundation is critical for a metal shed
. You have several options- Concrete Slab This is the most stable option, offering great durability. - Wooden Base A treated wooden base can also work, but ensure it is on the level and adequately supports the shed's weight. - Gravel Bed A layer of gravel can provide decent drainage and support as well.
erecting a metal shed
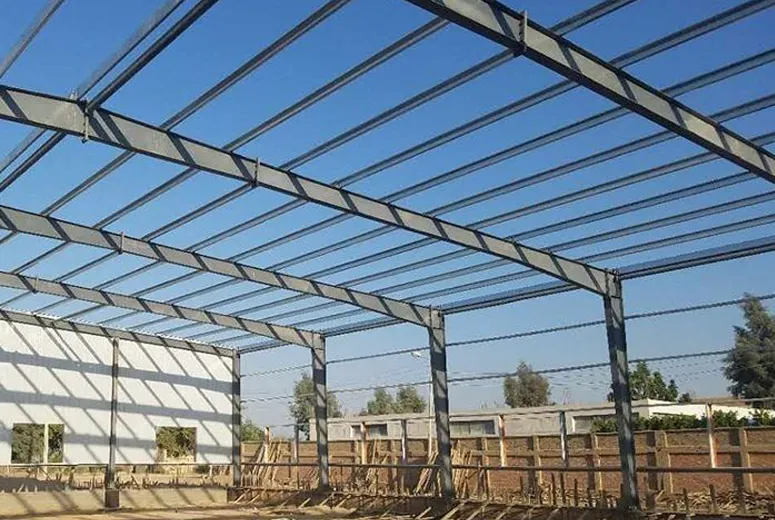
Make sure your foundation is level before proceeding to the next step.
Step 4 Assembling the Shed
Now comes the exciting part—assembling the shed!
1. Follow Instructions If you purchased a kit, carefully follow the manufacturer’s instructions. If constructing from scratch, use your plans as a guideline.
2. Ground Frame Start with the ground frame, ensuring it is square and level.
3. Walls Attach the wall panels to the frame. Use screws to secure them, ensuring they are at a right angle.
4. Roof Once the walls are erected, attach the roofing panels. Depending on the design, you may also need to install support beams.
5. Doors and Ventilation Install doors and any ventilation systems to prevent heat buildup and moisture accumulation inside the shed.
Step 5 Finishing Touches
After the shed is assembled, consider adding finishing touches
- Protective Coating Apply a protective sealant on exposed metal to prevent rust. - Shelving or Hooks Install shelves or hooks inside for better organization. - Paint or Decor Personalize your shed with paint or decorative elements to enhance its appearance.
Conclusion
Erecting a metal shed can be a fulfilling DIY project that enhances both the functionality and aesthetics of your property. With proper planning, the right materials, and a bit of effort, you can create a long-lasting and practical space for all your storage needs. Happy building!
-
How Do Prefabricated Steel Structures Transform Modern Construction?
NewsJul.14,2025
-
How Do Prefabricated Metal Buildings Redefine Modern Construction?
NewsJul.14,2025
-
How Do Prefab Insulated Metal Buildings and Steel Structures Revolutionize Modern Construction?
NewsJul.14,2025
-
How Do Pre - Engineered Steel Structures Redefine Modern Construction?
NewsJul.14,2025
-
Advancing Modular Construction with Prefabricated Metal Structures
NewsJul.14,2025
-
Advancing Industrial Infrastructure with Prefabricated Steel Solutions
NewsJul.14,2025
Products categories
Our Latest News
We have a professional design team and an excellent production and construction team.


