- Afrikaans
- Albanian
- Amharic
- Arabic
- Armenian
- Azerbaijani
- Basque
- Belarusian
- Bengali
- Bosnian
- Bulgarian
- Catalan
- Cebuano
- Corsican
- Croatian
- Czech
- Danish
- Dutch
- English
- Esperanto
- Estonian
- Finnish
- French
- Frisian
- Galician
- Georgian
- German
- Greek
- Gujarati
- Haitian Creole
- hausa
- hawaiian
- Hebrew
- Hindi
- Miao
- Hungarian
- Icelandic
- igbo
- Indonesian
- irish
- Italian
- Japanese
- Javanese
- Kannada
- kazakh
- Khmer
- Rwandese
- Korean
- Kurdish
- Kyrgyz
- Lao
- Latin
- Latvian
- Lithuanian
- Luxembourgish
- Macedonian
- Malgashi
- Malay
- Malayalam
- Maltese
- Maori
- Marathi
- Mongolian
- Myanmar
- Nepali
- Norwegian
- Norwegian
- Occitan
- Pashto
- Persian
- Polish
- Portuguese
- Punjabi
- Romanian
- Russian
- Samoan
- Scottish Gaelic
- Serbian
- Sesotho
- Shona
- Sindhi
- Sinhala
- Slovak
- Slovenian
- Somali
- Spanish
- Sundanese
- Swahili
- Swedish
- Tagalog
- Tajik
- Tamil
- Tatar
- Telugu
- Thai
- Turkish
- Turkmen
- Ukrainian
- Urdu
- Uighur
- Uzbek
- Vietnamese
- Welsh
- Bantu
- Yiddish
- Yoruba
- Zulu
Sep . 14, 2024 22:42 Back to list
Putting Together a Metal Shed A Step-by-Step Guide
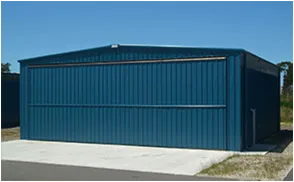
Building a metal shed can be an exciting and rewarding project. Whether you need extra storage space, a workshop, or a place to store gardening tools, a metal shed is durable, weather-resistant, and easy to maintain. In this article, we'll walk you through the key steps involved in assembling your metal shed, ensuring you have a seamless experience from start to finish.
Step 1 Planning and Preparation
Before you dive into assembling your metal shed, it's essential to plan. Start with the following steps
1. Choose the Right Location Identify a flat, dry area in your yard where you’d like to place your shed. Ensure that it’s easily accessible, yet doesn’t obstruct any ongoing yard activities.
2. Check Local Regulations Consult your local neighborhood association or building department to understand zoning restrictions and whether you need a permit to put up a shed.
3. Gather Tools and Materials Common tools you will need include a wrench, screwdriver, level, and a measuring tape. Many metal shed kits come with their necessary parts, but ensure you have everything before starting.
Step 2 Preparing the Foundation
A solid foundation is crucial for your shed’s longevity. Depending on the size of the shed and soil characteristics, you may opt for
- Concrete Slab This is the most durable option but requires more effort and investment. - Gravel Base Lay down a layer of gravel to allow for drainage. - Wooden Frame If you’re looking for a simpler solution, pressure-treated wood can support the structure.
Be sure the foundation is level and stable, as this will affect the overall construction of the shed.
Step 3 Unpacking and Organizing Parts
putting together metal shed

Once your foundation is ready, unpack the metal shed kit and lay out all the components. This will help you become familiar with what’s included and identify any missing parts. Check the instruction manual rigorously—it is your best ally for this project.
Step 4 Assembly Process
Now, you can start putting together your shed
1. Construct the Base Frame Use metal brackets and screws to assemble the frame according to the provided manual.
2. Attach Wall Panels Start with one wall and gradually attach the others. Ensure each wall is fastened securely before moving on to the next.
3. Install Roof Panels Once the walls are up, it’s time to secure the roof panels. This step might require assistance, depending on the weight and size of your shed.
4. Add Doors and Ventilation Install the doors as per the instructions. If your shed is going to house tools or other equipment that need ventilation, consider adding vents during this stage.
Step 5 Finishing Touches
After the assembly is complete, it’s time for the finishing touches
- Paint or Seal Consider painting the exterior or applying a protective sealant to enhance durability and aesthetics. - Organize the Interior Once dried, you can organize shelving, hang tools, and make the space functional.
Conclusion
Assembling a metal shed is a manageable DIY project that can provide you with invaluable storage space tailored to your needs. By following these steps, you can ensure your new shed is built correctly and efficiently. With proper planning and execution, your metal shed will stand as a reliable structure in your yard for years to come. Enjoy your newly created space!
-
Steel Frame Factory with Insulated Roof Panels
NewsAug.14,2025
-
Prefab Metal Building with Insulation Package Options
NewsAug.14,2025
-
Industrial Steel Sheds for Temporary Workshop Use
NewsAug.14,2025
-
Metal Workshops Featuring Corrugated Steel Roofs
NewsAug.14,2025
-
Modular Steel Frame Excellence: Our Pursuit of Perfection
NewsAug.14,2025
-
Metal Garage Kits Crafted with Customer Satisfaction at Heart
NewsAug.14,2025
Products categories
Our Latest News
We have a professional design team and an excellent production and construction team.


