- Afrikaans
- Albanian
- Amharic
- Arabic
- Armenian
- Azerbaijani
- Basque
- Belarusian
- Bengali
- Bosnian
- Bulgarian
- Catalan
- Cebuano
- Corsican
- Croatian
- Czech
- Danish
- Dutch
- English
- Esperanto
- Estonian
- Finnish
- French
- Frisian
- Galician
- Georgian
- German
- Greek
- Gujarati
- Haitian Creole
- hausa
- hawaiian
- Hebrew
- Hindi
- Miao
- Hungarian
- Icelandic
- igbo
- Indonesian
- irish
- Italian
- Japanese
- Javanese
- Kannada
- kazakh
- Khmer
- Rwandese
- Korean
- Kurdish
- Kyrgyz
- Lao
- Latin
- Latvian
- Lithuanian
- Luxembourgish
- Macedonian
- Malgashi
- Malay
- Malayalam
- Maltese
- Maori
- Marathi
- Mongolian
- Myanmar
- Nepali
- Norwegian
- Norwegian
- Occitan
- Pashto
- Persian
- Polish
- Portuguese
- Punjabi
- Romanian
- Russian
- Samoan
- Scottish Gaelic
- Serbian
- Sesotho
- Shona
- Sindhi
- Sinhala
- Slovak
- Slovenian
- Somali
- Spanish
- Sundanese
- Swahili
- Swedish
- Tagalog
- Tajik
- Tamil
- Tatar
- Telugu
- Thai
- Turkish
- Turkmen
- Ukrainian
- Urdu
- Uighur
- Uzbek
- Vietnamese
- Welsh
- Bantu
- Yiddish
- Yoruba
- Zulu
Nov . 22, 2024 11:18 Back to list
Building a Metal Shed A Comprehensive Guide
When it comes to organizing your outdoor space, a metal shed can be an invaluable asset. Offering durability, low maintenance, and security for your tools and equipment, metal sheds have become increasingly popular among homeowners. This article will guide you through the process of putting together a metal shed, ensuring that you achieve a sturdy and functional storage solution.
Step 1 Planning and Preparation
Before you start assembling your metal shed, it's essential to plan carefully. First, determine the size of the shed you need based on what you'll be storing. Whether you want to house gardening tools, bicycles, or larger equipment, having a clear idea will help you choose the right dimensions.
Next, select a suitable location for your shed. Ideally, it should be on level ground, away from tree branches that might cause damage. Ensure that the area is accessible, as this will make it easier to move items in and out. Additionally, check local zoning laws and regulations to ensure that you're compliant with any restrictions regarding shed placement.
Step 2 Gathering Materials and Tools
Once your plan is in place, gather all necessary materials and tools. Most metal sheds come as a kit, complete with pre-cut panels, screws, and other hardware. You should also have basic tools such as a drill, screwdriver, level, and possibly a saw, depending on your specific shed design.
It's advisable to have a friend or family member assist you during assembly
. Not only will this make the process quicker, but having an extra pair of hands can also ensure that the structure is built safely and accurately.Step 3 Foundation Setup
putting together metal shed
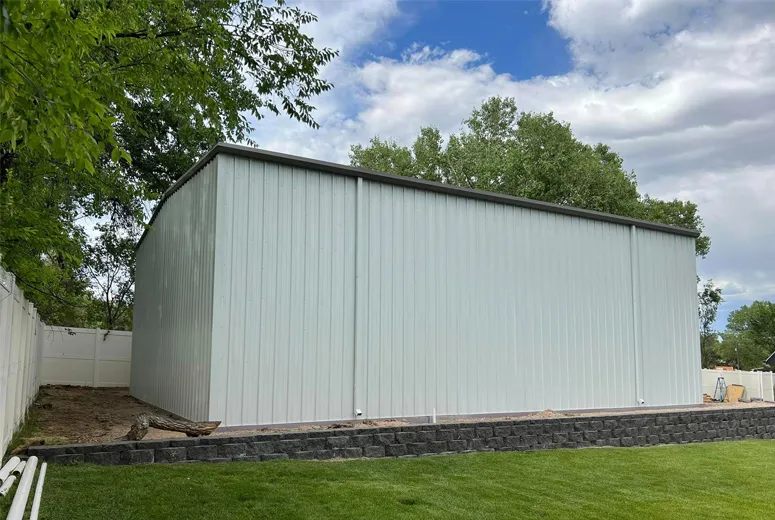
A solid foundation is crucial for the longevity of your metal shed. Depending on your preference, you can choose a concrete slab, treated wood, or a gravel base. For a basic metal shed, a gravel foundation often suffices. To set up the foundation, measure the dimensions of your shed's base and mark the area. Clear away any debris or vegetation, then level the ground before laying down your chosen foundation material.
Step 4 Assembling the Shed
With your foundation ready, you can start assembling the shed. Begin by following the manufacturer's instructions closely, as they are designed to facilitate efficient assembly. Typically, you'll start by constructing the floor frame and attaching it to the foundation. Then, work your way up, focusing on the wall panels.
When installing the wall panels, ensure they are properly aligned and securely fastened. It’s important to use a level throughout this process to avoid any discrepancies that could affect the overall structure. After the walls are up, proceed to add the roof, ensuring that all parts fit snugly together for maximum protection against the elements.
Step 5 Final Touches
Once the main structure is complete, it’s time to add any final touches. This could include installing shelving for organization, adding windows for light, or even painting the exterior to match your home. Securing a lock on the door is also vital for safety if you plan to store valuable equipment inside.
Conclusion
Putting together a metal shed might seem daunting at first, but with proper planning and execution, it can be a straightforward and rewarding project. By following these steps, not only will you create a functional space for your tools and equipment, but you'll also add value to your property. A well-constructed metal shed can withstand the test of time, providing you with a reliable storage solution for years to come. So roll up your sleeves, gather your materials, and get started on this beneficial endeavor!
-
How Do Prefabricated Steel Structures Transform Modern Construction?
NewsJul.14,2025
-
How Do Prefabricated Metal Buildings Redefine Modern Construction?
NewsJul.14,2025
-
How Do Prefab Insulated Metal Buildings and Steel Structures Revolutionize Modern Construction?
NewsJul.14,2025
-
How Do Pre - Engineered Steel Structures Redefine Modern Construction?
NewsJul.14,2025
-
Advancing Modular Construction with Prefabricated Metal Structures
NewsJul.14,2025
-
Advancing Industrial Infrastructure with Prefabricated Steel Solutions
NewsJul.14,2025
Products categories
Our Latest News
We have a professional design team and an excellent production and construction team.


